Python PyCharm Installation and Usage
PyCharm is a Python Integrated Development Environment (IDE) developed by JetBrains, featuring intelligent code completion and graphical debugging capabilities, supporting Windows / macOS / Linux platforms.
PyCharm is an all-in-one tool for writing code, running programs, debugging, managing projects, and collaboration — it is currently the most mainstream Python development tool in the industry.
This chapter will introduce the installation of Python and PyCharm, and guide you through creating and running your first Python program.
| Stage | Content |
|---|---|
| 1. Install Python | Download, install, and verify the Python interpreter |
| 2. Install PyCharm | Download and install PyCharm Community Edition |
| 3. Create a Project | Create a new project and Python file |
| 4. Write and Run Code | Write hello.py and run it |
Installing Python
Section titled “Installing Python”Python is the interpreter required to run Python programs. PyCharm depends on it to execute code.
Installing Python involves three steps: downloading the installer, running the installation, and verifying the installation result.
Downloading Python
Section titled “Downloading Python”Open your browser and visit the Python official website download page: https://www.python.org/downloads/.
The website will usually automatically detect your operating system (Windows / macOS / Linux). Click the yellow button on the page to download the latest version.
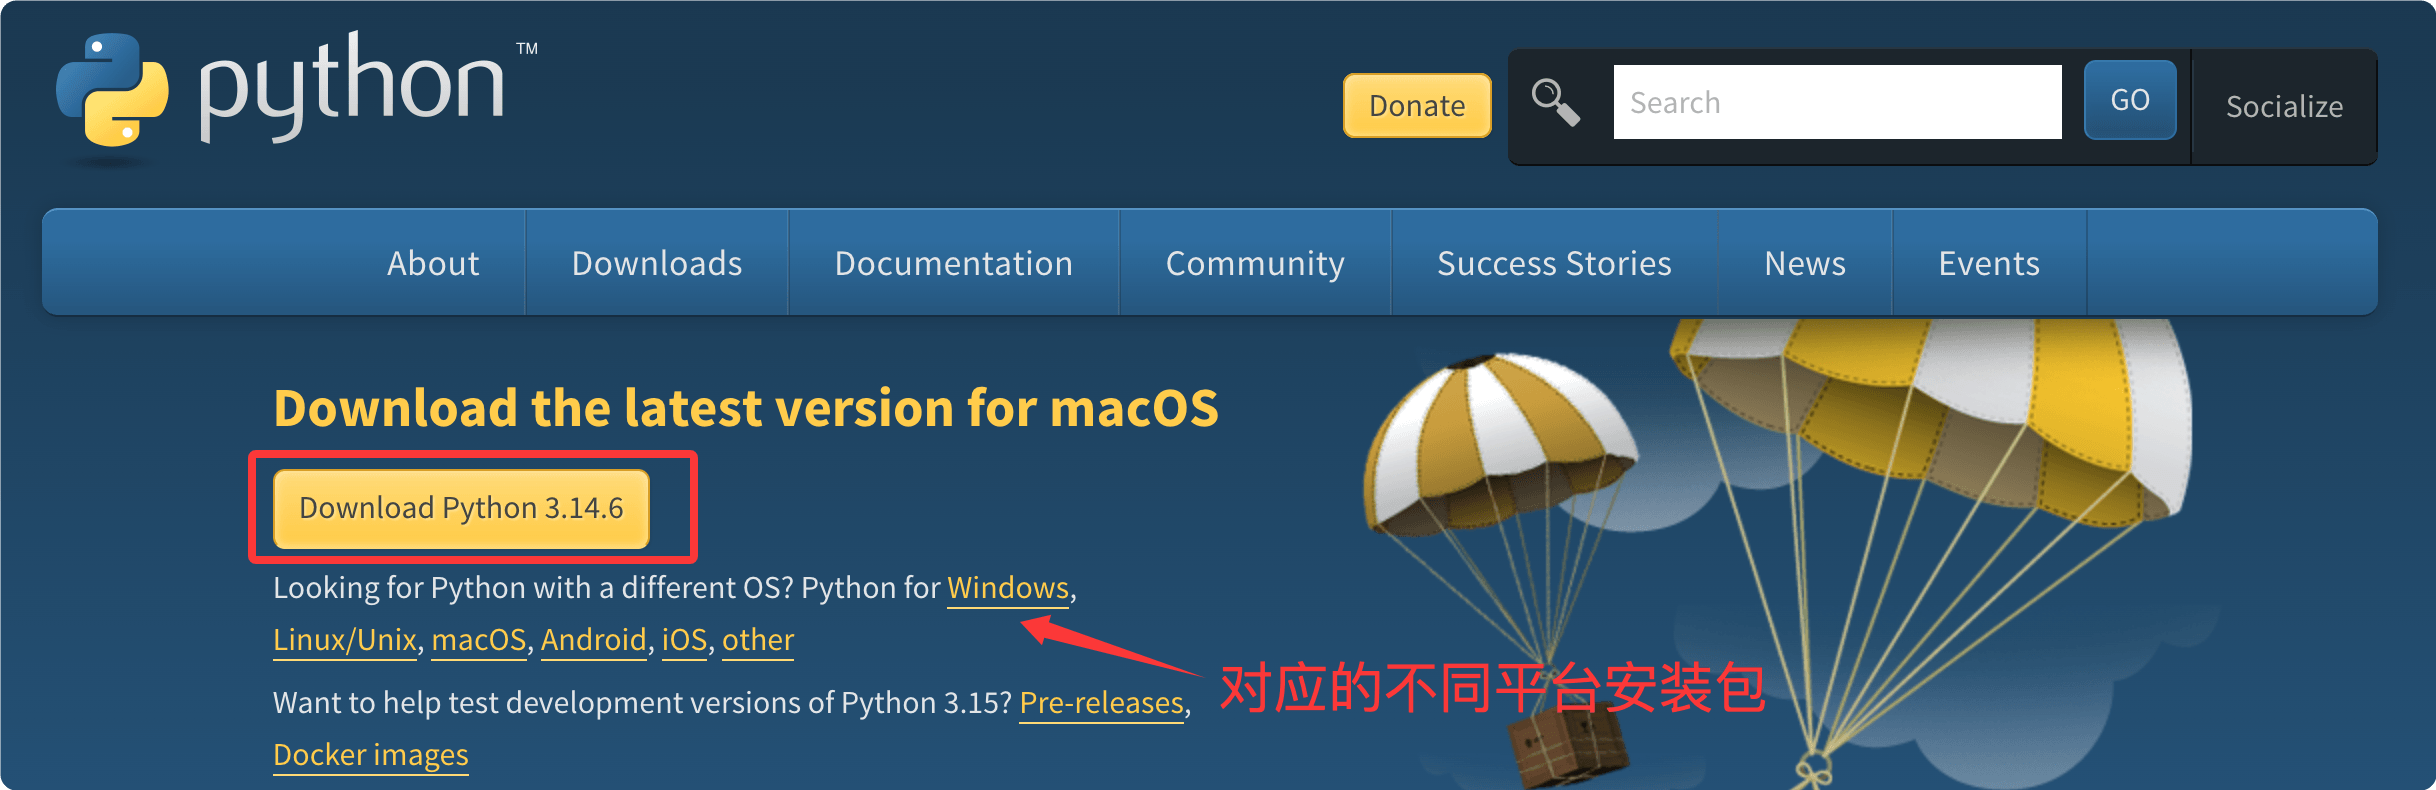
It is recommended to choose Python 3.10 or above. Most tutorials and third-party libraries currently have good support for newer versions. Python 2.x has been discontinued since 2020 — do not use it anymore.
Installing Python
Section titled “Installing Python”The following uses Windows as an example. macOS and Linux users should refer to the corresponding instructions.
Windows Installation Steps:
| Step | Action | Description |
|---|---|---|
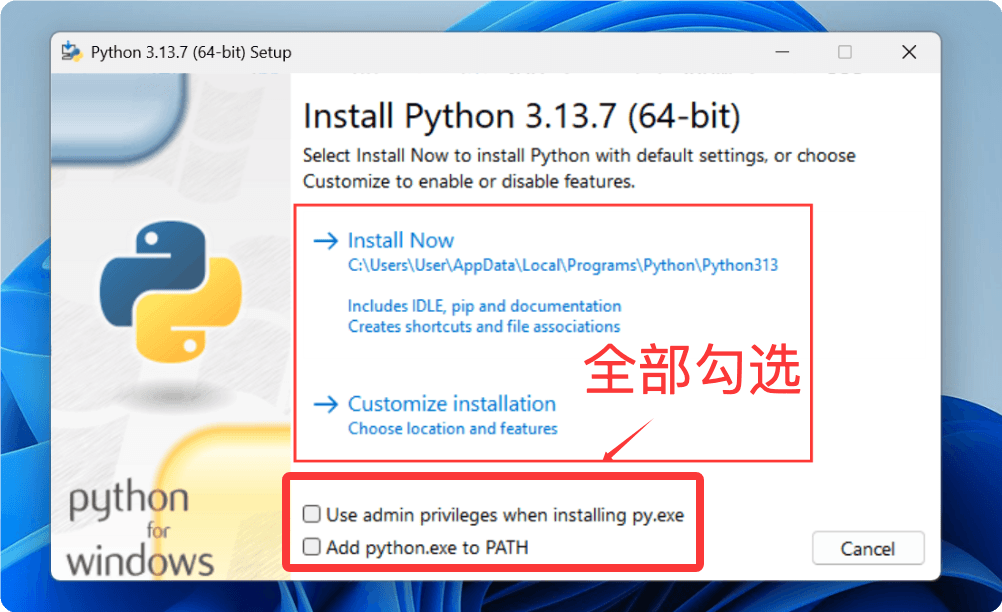
| 1 | Double-click the installer | Run the downloaded .exe file, e.g., python-3.12.x-amd64.exe |
| 2 | Check the PATH option | Critical step: Check Add python.exe to PATH at the bottom of the installation interface, otherwise the command line may not find Python
|
| 3 | Click Install Now | Wait for the installation progress bar to complete |
macOS Users:
You can double-click the .pkg installer and follow the prompts to complete the installation, or install via the Homebrew package manager:
Verifying Installation
Section titled “Verifying Installation”Open the command line tool (Command Prompt or PowerShell on Windows, Terminal on macOS) and enter the following command:
If a version number like Python 3.12.0 is displayed, the installation was successful.
On some systems (especially macOS/Linux), the system’s built-in
pythoncommand points to Python 2. In this case, you need to enterpython3 --versionto check the newly installed Python 3.
Installing PyCharm
Section titled “Installing PyCharm”PyCharm is developed by JetBrains and is one of the most popular Python IDEs today.
It comes in two editions. Beginners should choose the free Community edition:
| Edition | Cost | Target Audience | Main Features |
|---|---|---|---|
| Professional | Paid | Professional developers | Supports web development, database tools, scientific computing, and other full-featured capabilities |
| Community | Free | Beginners / Students | Core features for pure Python development, fully sufficient for beginners |
Downloading PyCharm
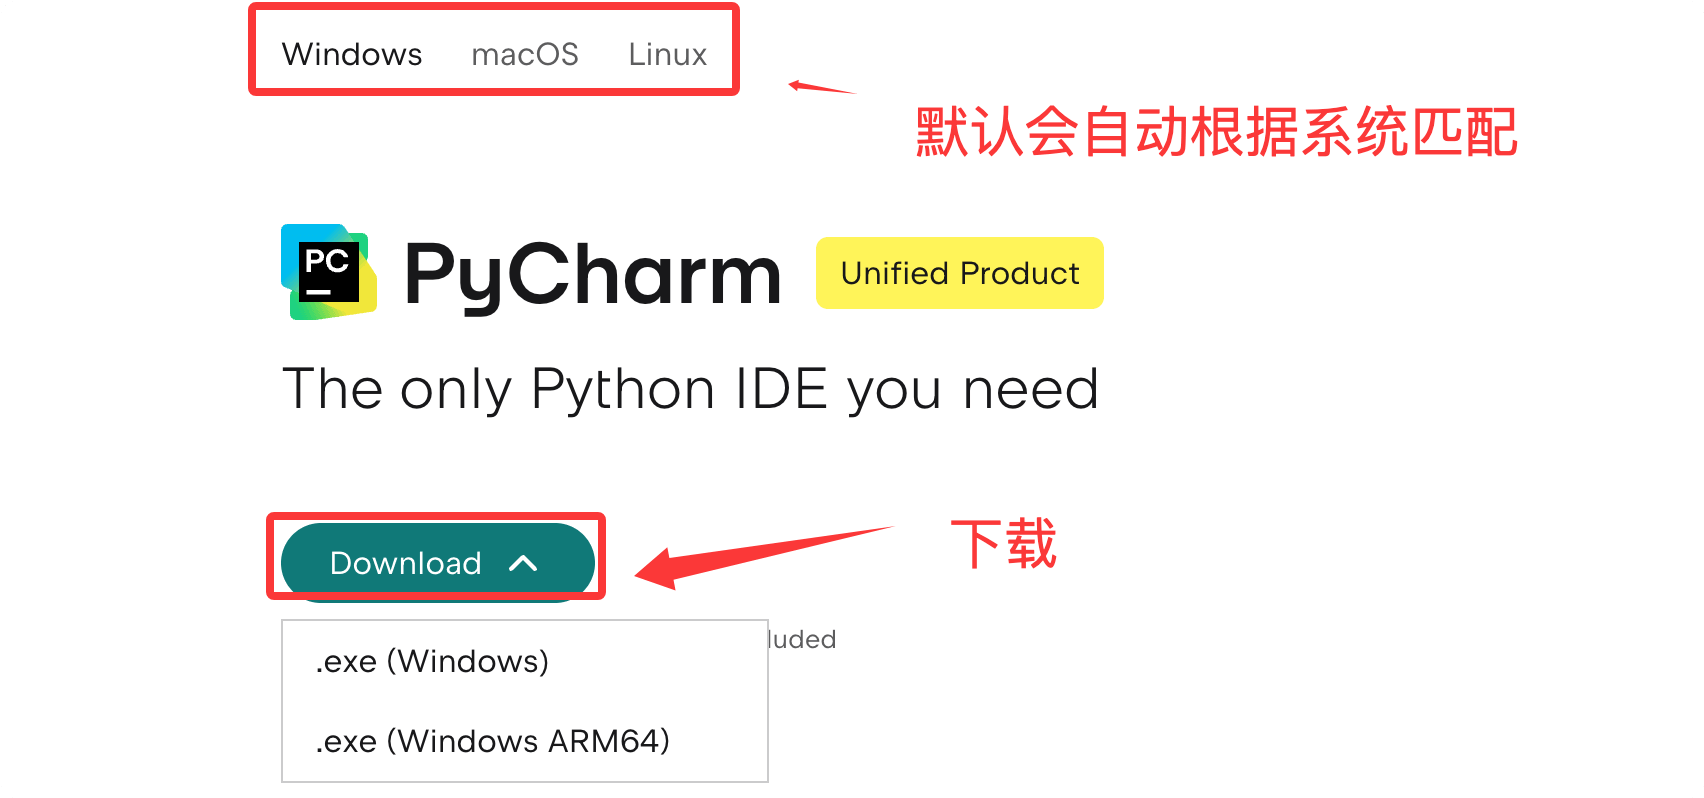
Section titled “Downloading PyCharm”Visit the PyCharm download page on JetBrains’ official website: https://www.jetbrains.com/pycharm/download/.
Find the Download button on the page and click the download button for your operating system.
Installing PyCharm
Section titled “Installing PyCharm”The installation methods for different operating systems are as follows:
| Operating System | Installation Method |
|---|---|
| Windows | Double-click the .exe installer and click “Next” through the steps. It is recommended to check “Create Desktop Shortcut” |
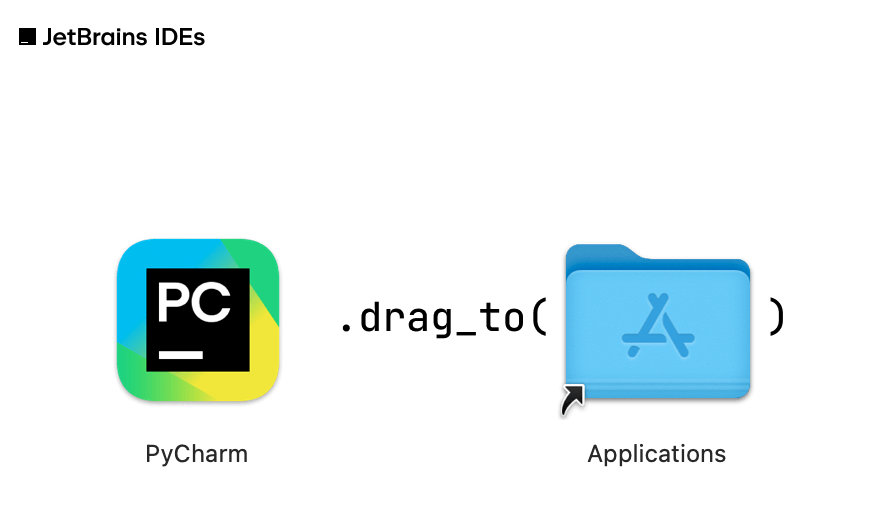
| macOS | Double-click the .dmg file and drag the PyCharm icon into the Applications folder |
| Linux | Extract the .tar.gz and run bin/pycharm.sh, or install via Snap |
Linux Snap Installation Command:
After installation, open PyCharm. The first launch will guide you to choose a UI theme and keyboard shortcut scheme. Keep the default settings or choose according to your personal preference.
Installing PyCharm
Section titled “Installing PyCharm”Windows
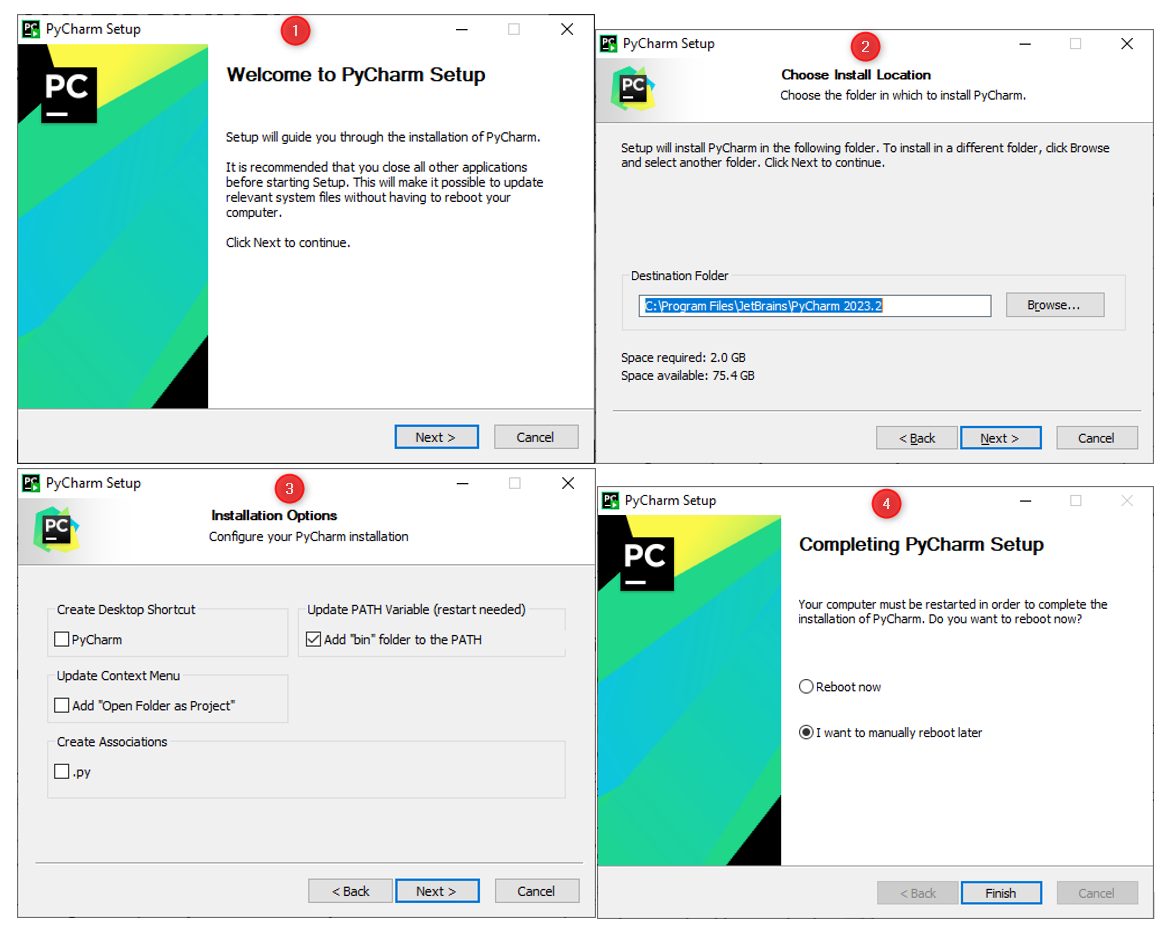
Section titled “Windows”- Double-click the downloaded installation file (
.exe). - In the installation wizard, choose the installation path. Using the default path is recommended.
- Check Create Desktop Shortcut for quick access to PyCharm.
- Click Install to begin installation.
- After installation, click Finish to exit the installation wizard.
-
Open the downloaded
.dmgfile. -
Drag the PyCharm icon into the “Applications” folder.
-
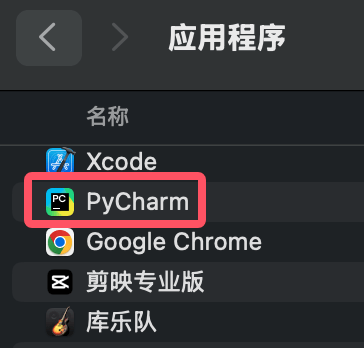
Find PyCharm in the “Applications” folder and double-click to launch.
-
Extract the downloaded
.tar.gzfile. -
Enter the extracted directory and find the
binfolder. -
Run
pycharm.shto start PyCharm.
Configuring PyCharm
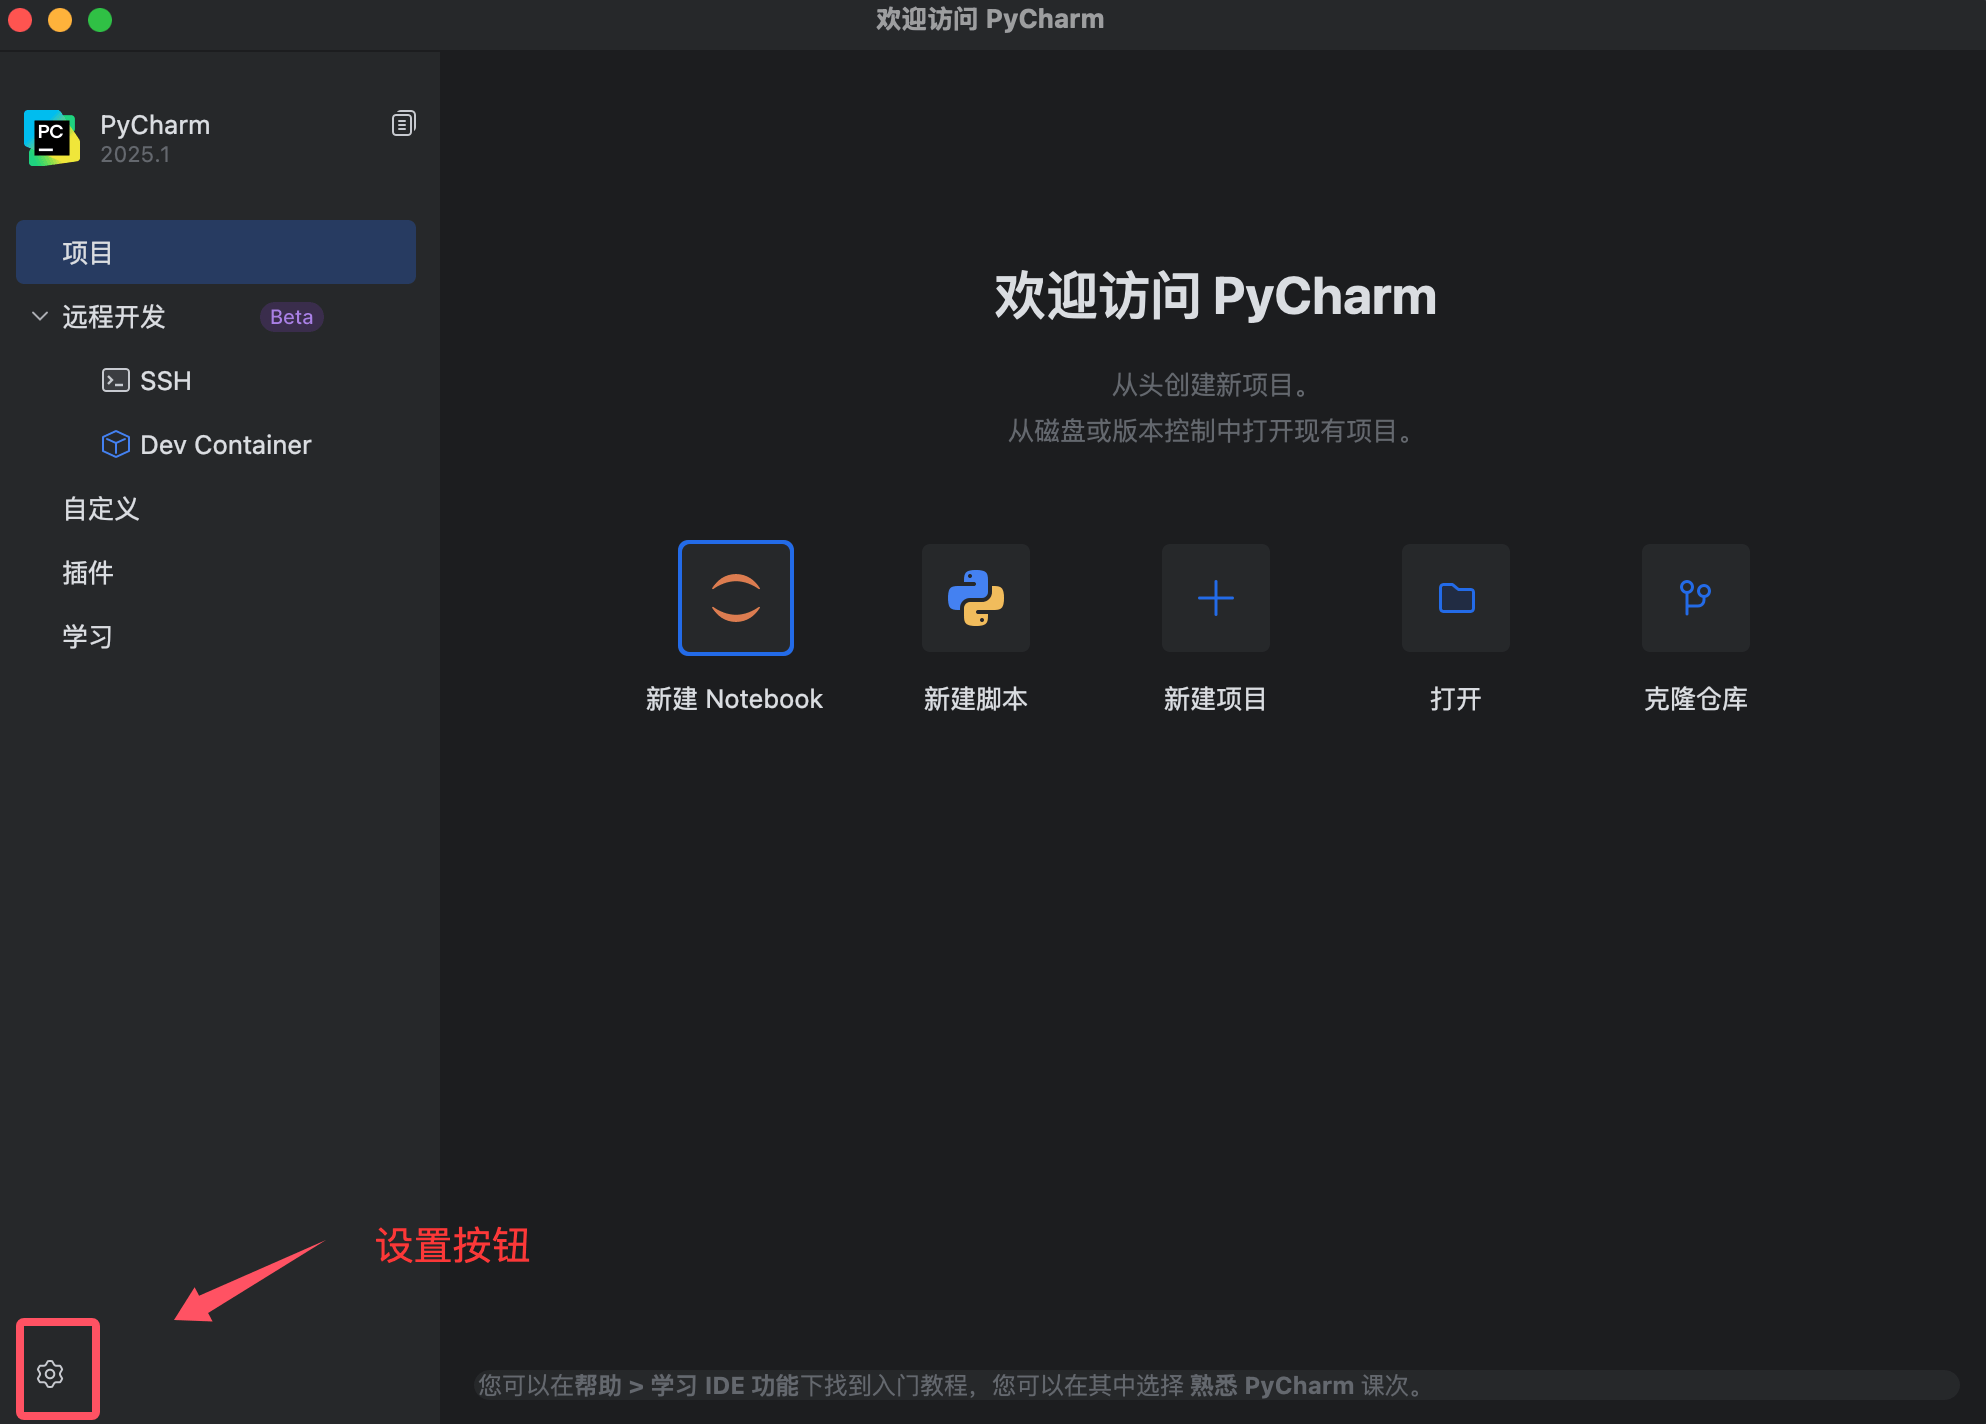
Section titled “Configuring PyCharm”When you first start PyCharm, you will be prompted to perform some initial configuration. You can set the language and agree to the terms:
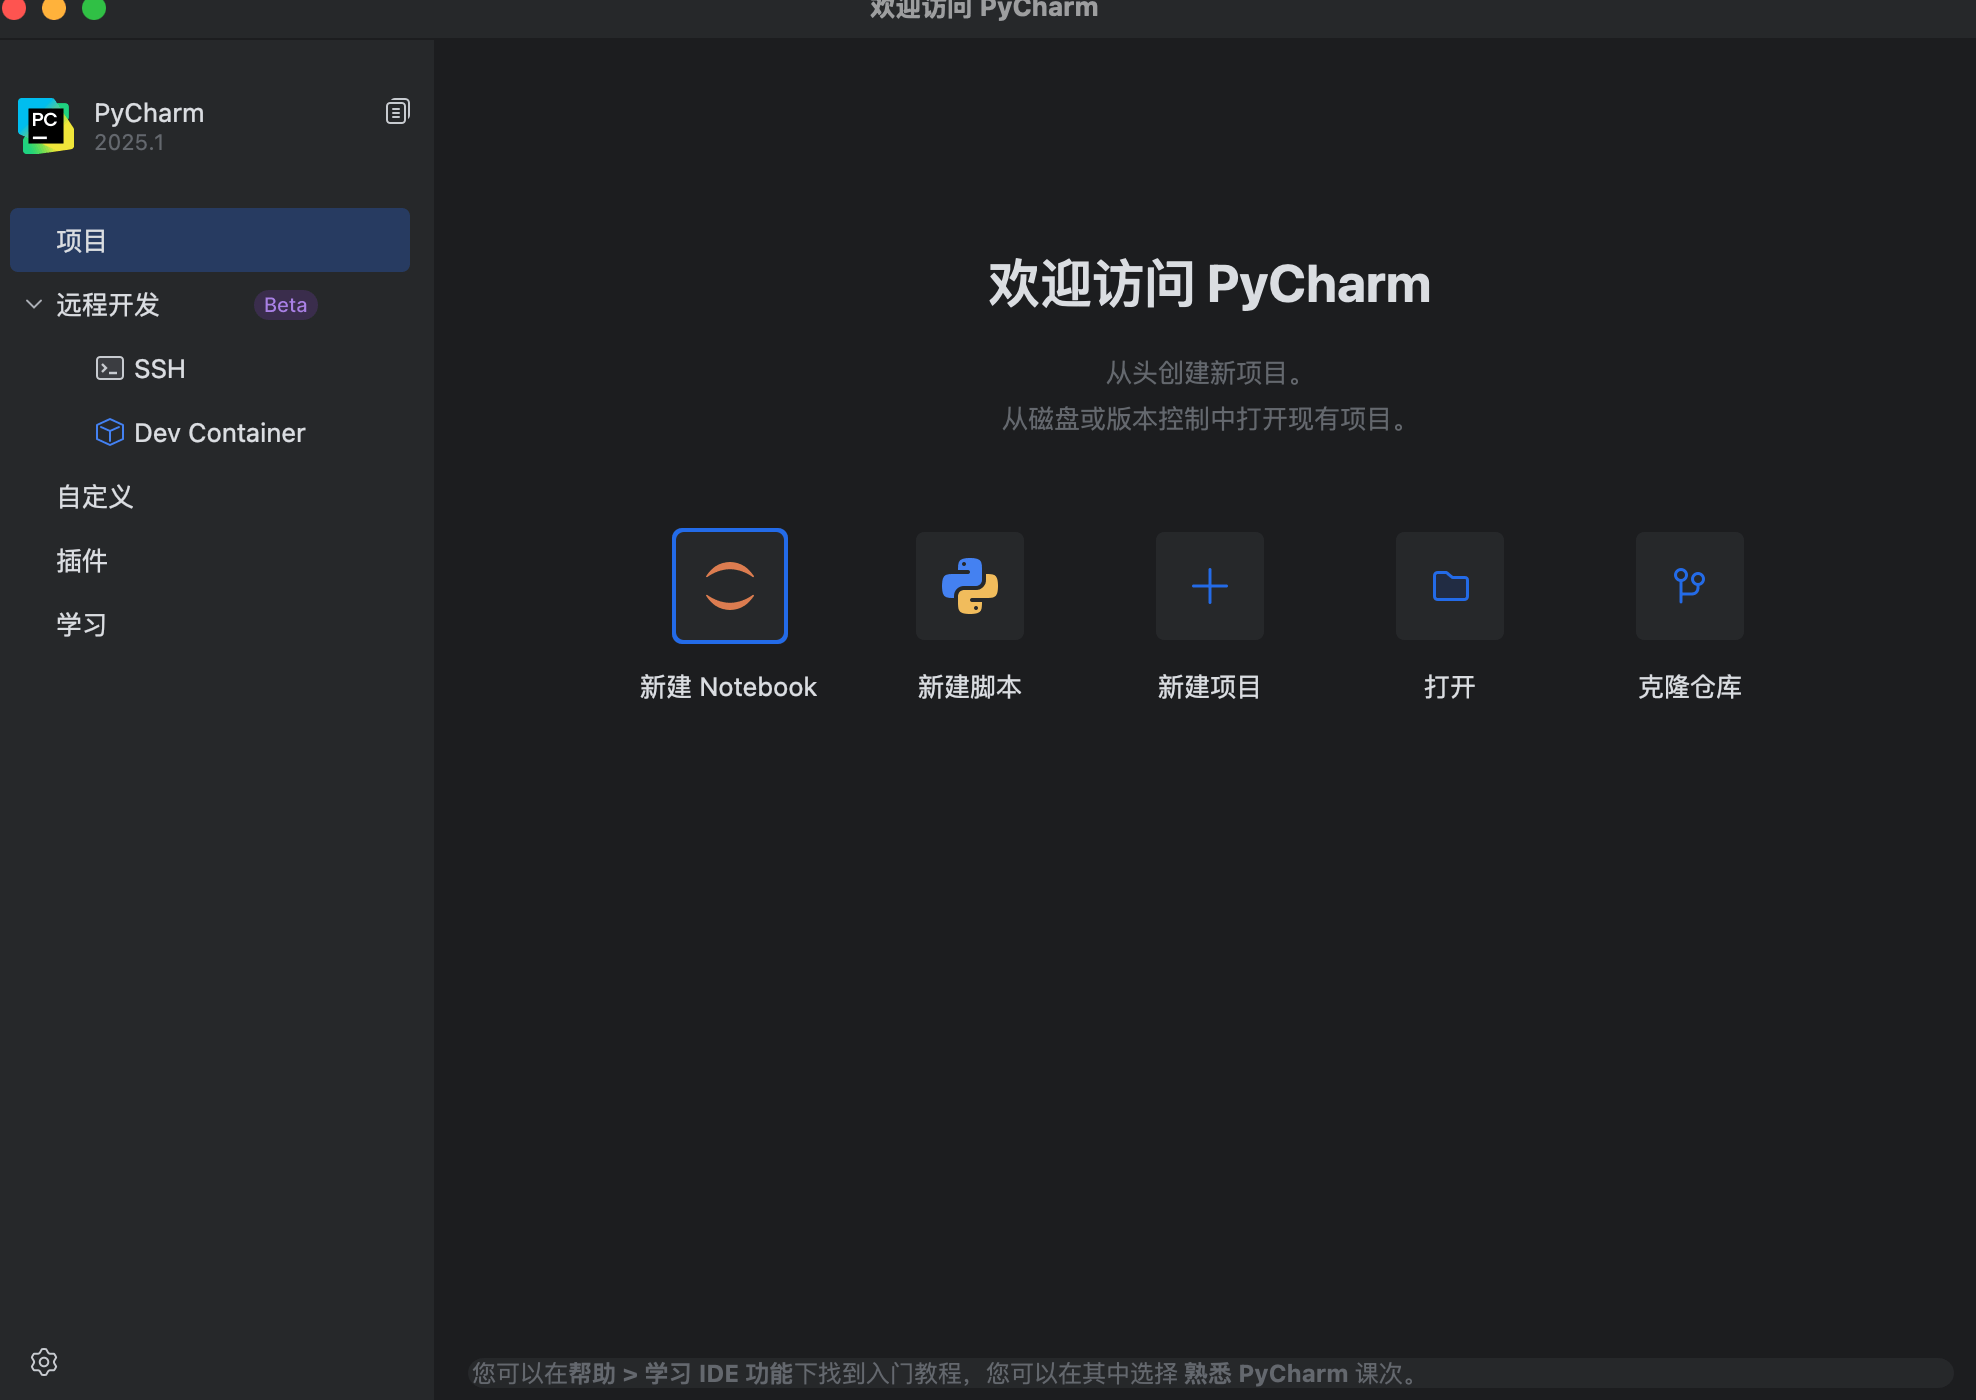
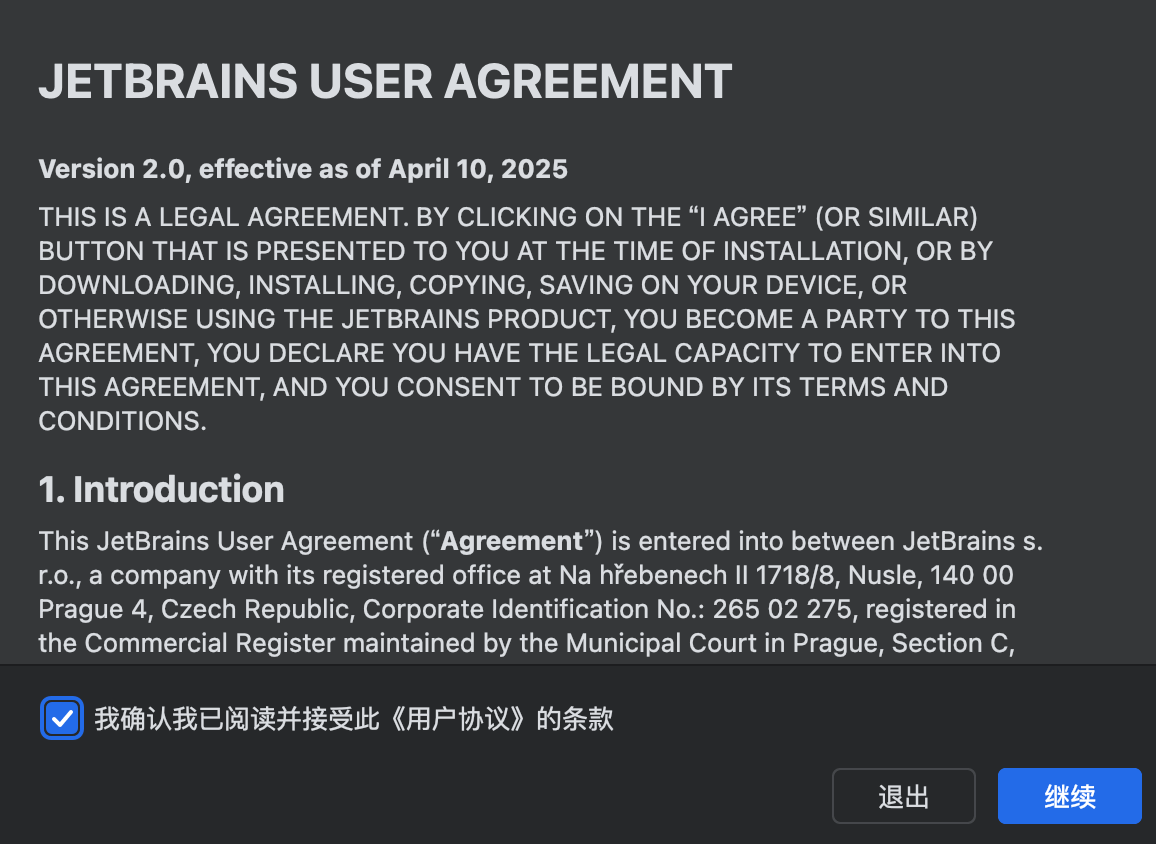
After startup, you can configure according to your personal preferences:
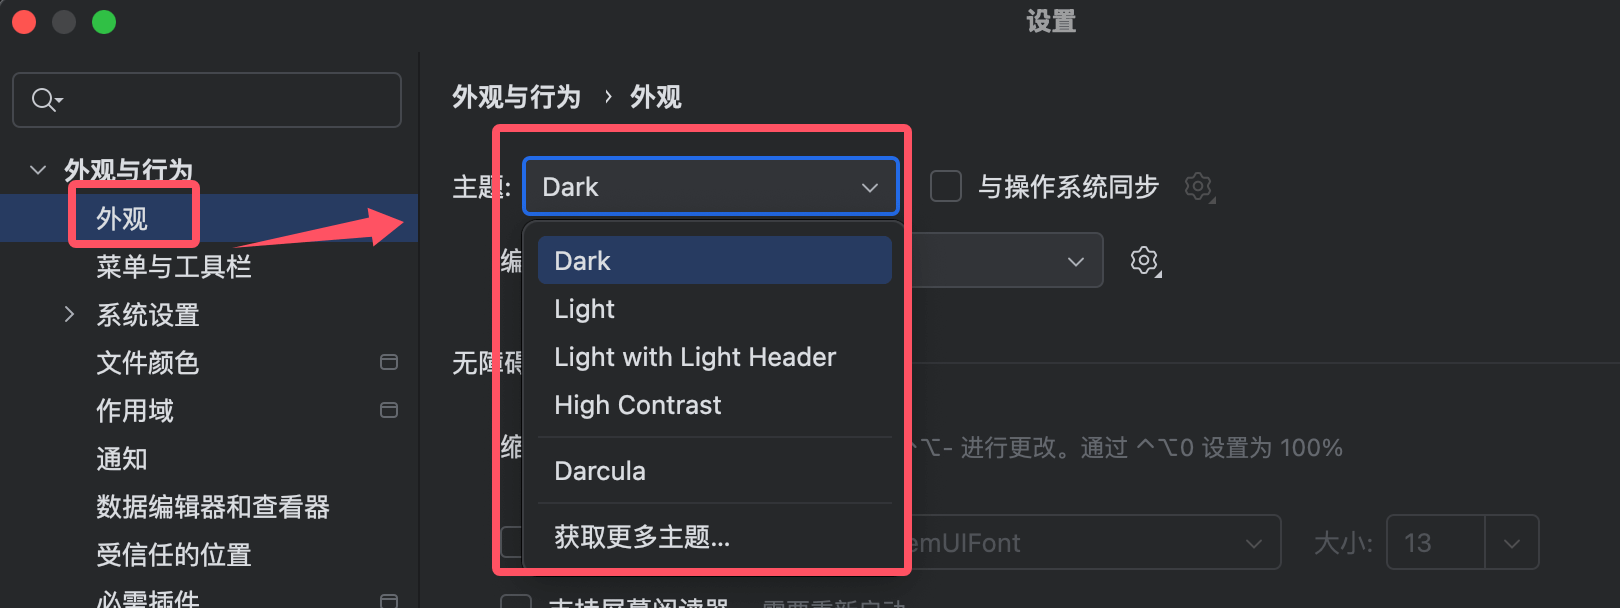
Choose a Theme: You can choose the “Darcula” (dark) or “Light” theme.
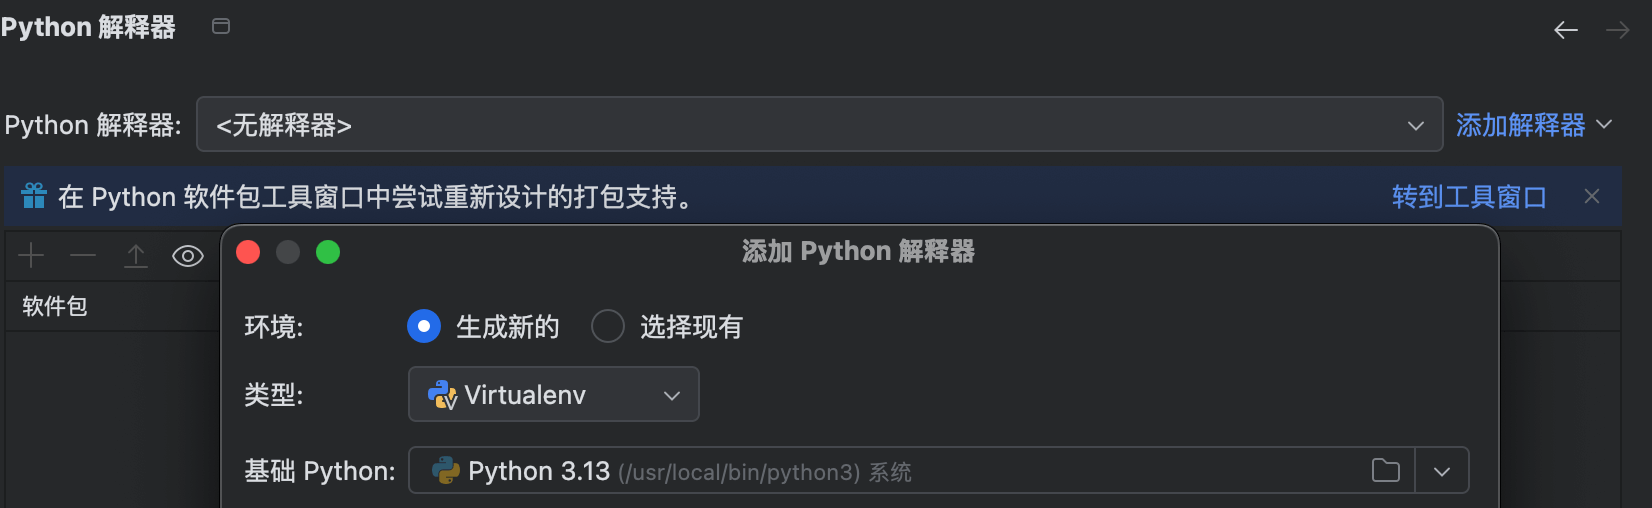
Configure Python Interpreter: If you have already installed Python, PyCharm will automatically detect and configure the interpreter. If not, you can add it manually.
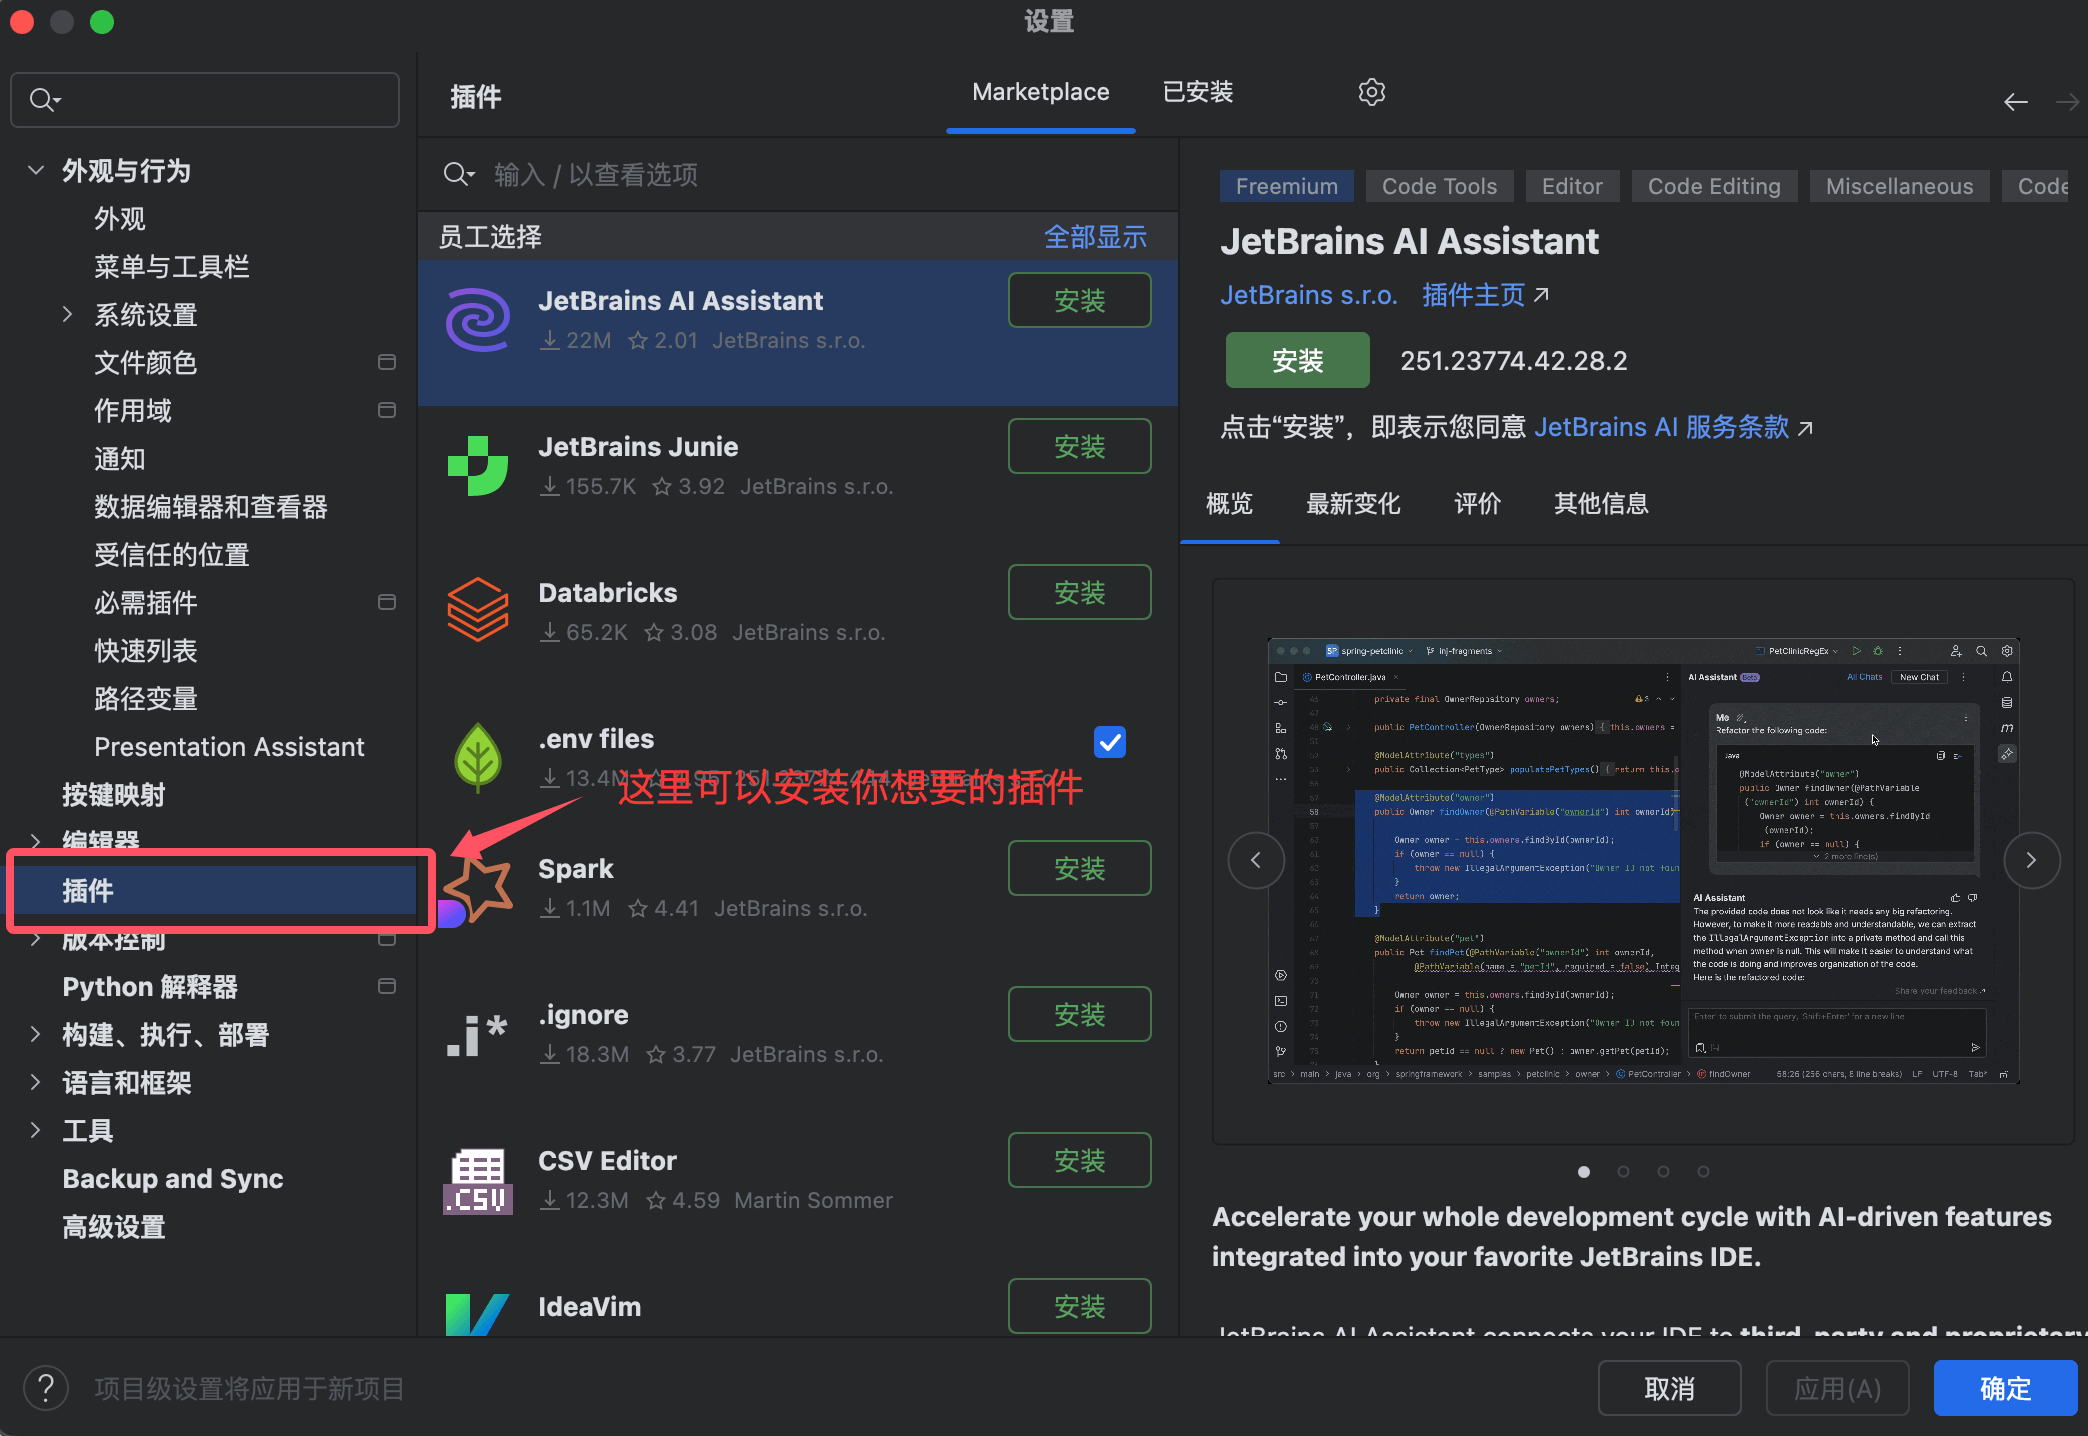
Install Plugins: PyCharm will recommend some commonly used plugins. You can choose to install them as needed.
Creating Your First Project
Section titled “Creating Your First Project”PyCharm manages code in units of Projects. One project corresponds to one folder, which can contain multiple Python files.
Creating a New Project
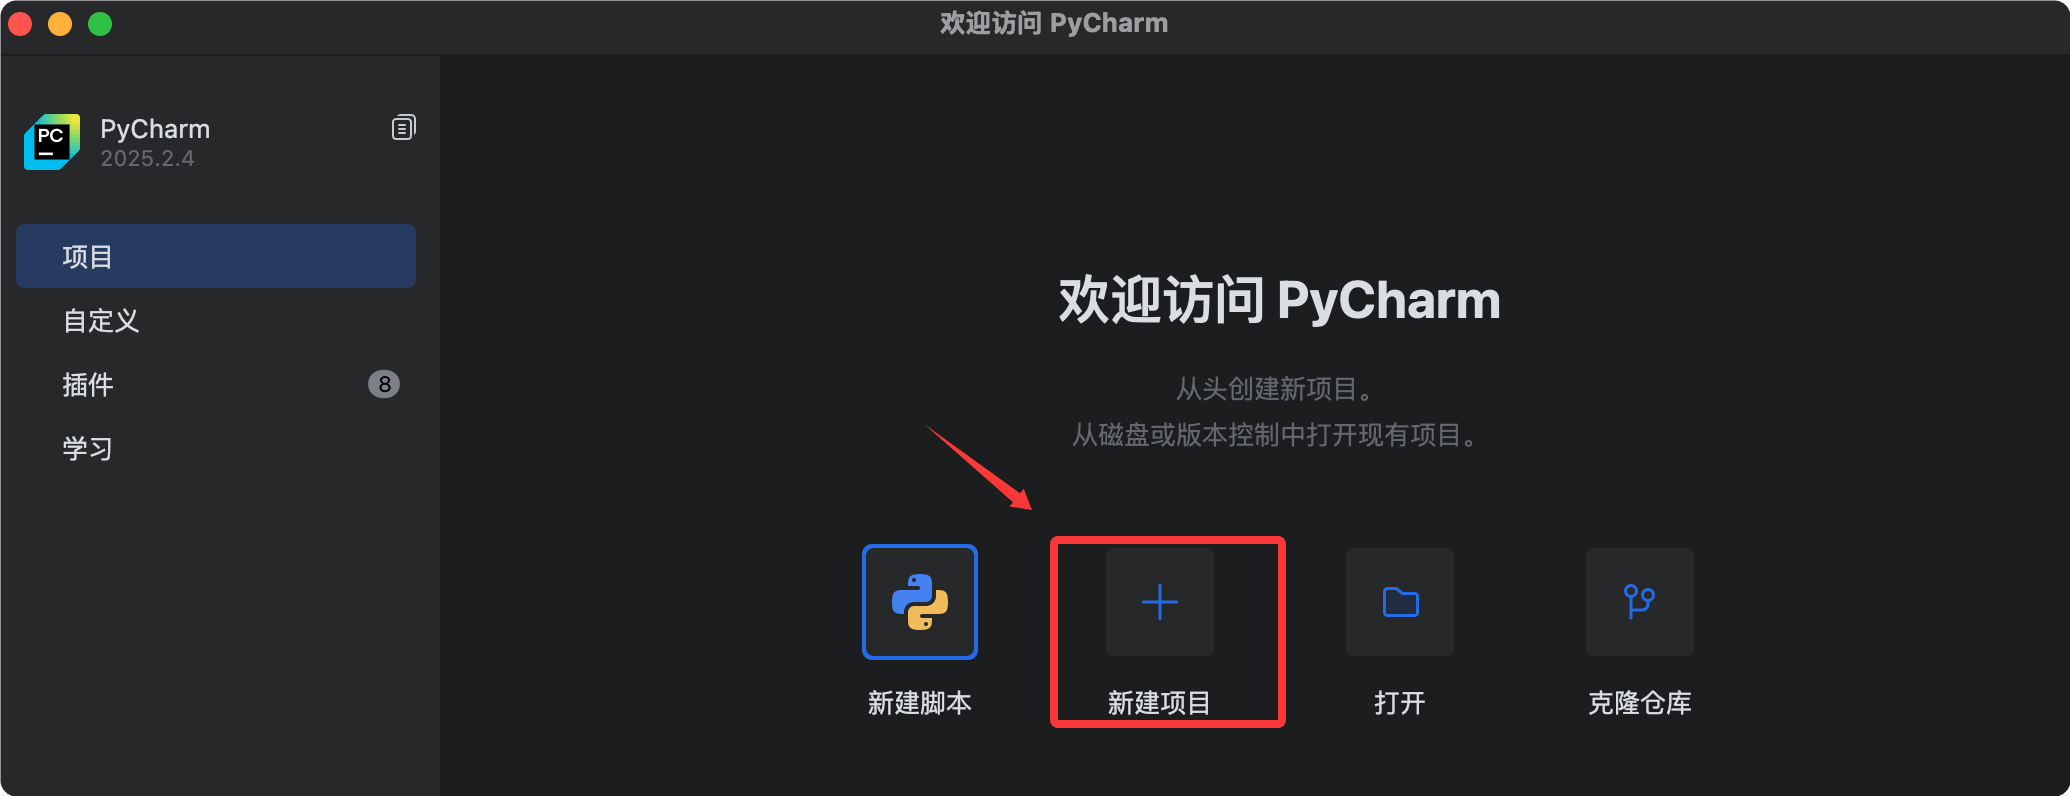
Section titled “Creating a New Project”After opening PyCharm, click the New Project button on the welcome screen.
In the creation window that pops up, you need to confirm two settings:
| Setting | Description | Example |
|---|---|---|
| Location | The save path of the project folder | D:\PythonProjects\HelloWorld |
| Python Interpreter | The path to the Python interpreter; PyCharm usually detects it automatically | If not auto-detected, manually select python.exe or python3 |
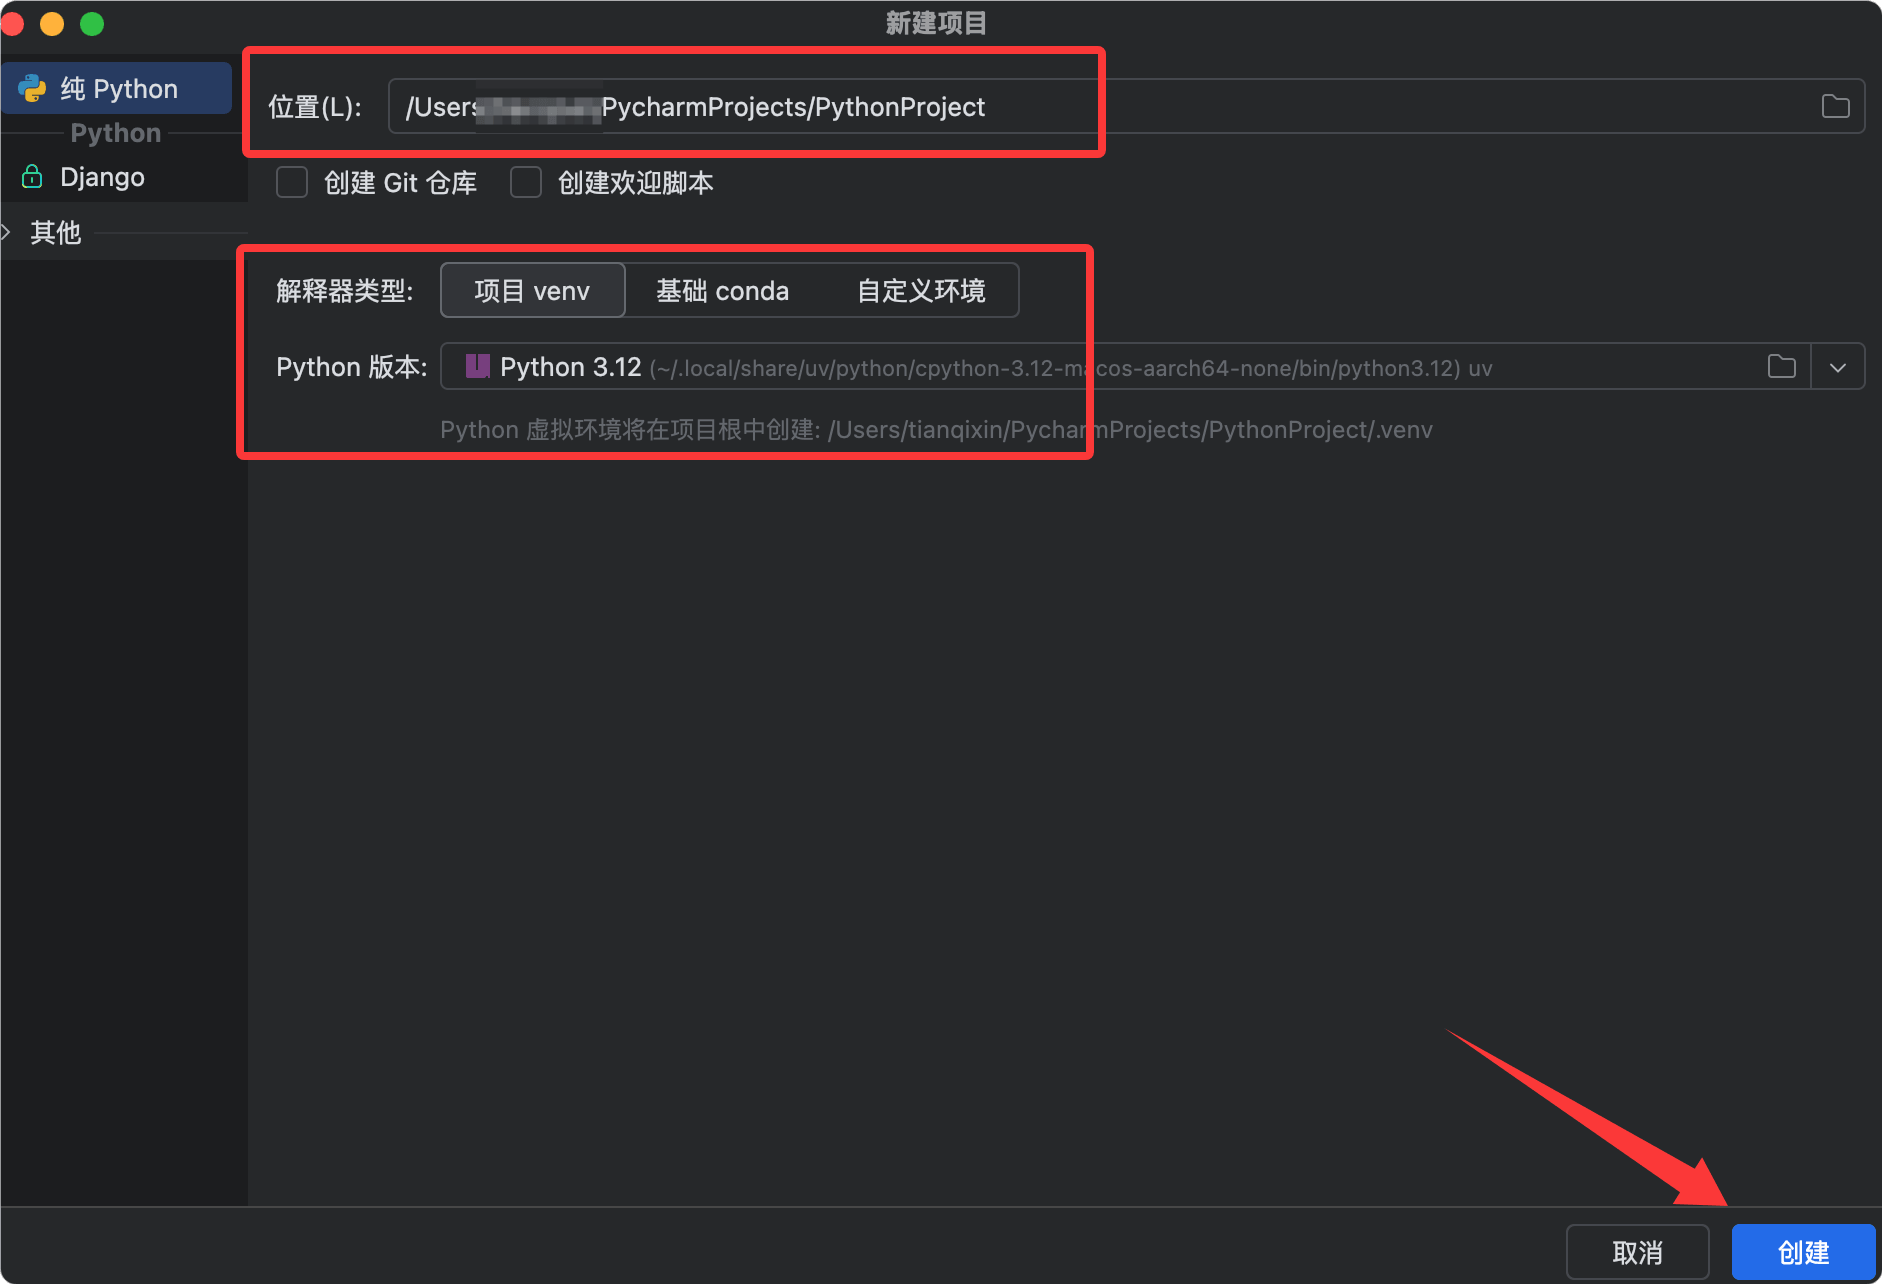
After confirming everything is correct, click the Create button in the lower right corner.
Do not include Chinese characters or spaces in the project path, as this may cause some third-party tools to run abnormally. Using an all-English path is recommended.
Creating a New Python File
Section titled “Creating a New Python File”After the project is created, follow these steps in the PyCharm main interface to create a Python file:
| Step | Action |
|---|---|
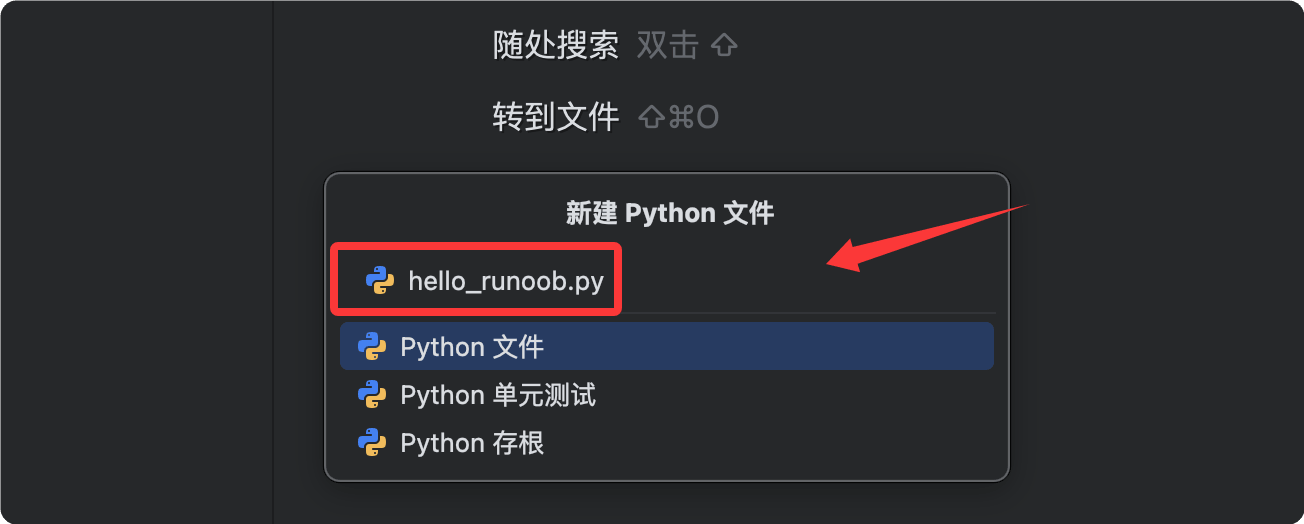
| 1 | In the Project panel on the left, right-click the project root directory |
| 2 | Select New → Python File |
| 3 | Enter a file name (e.g., hello_runoob) and press Enter to confirm |
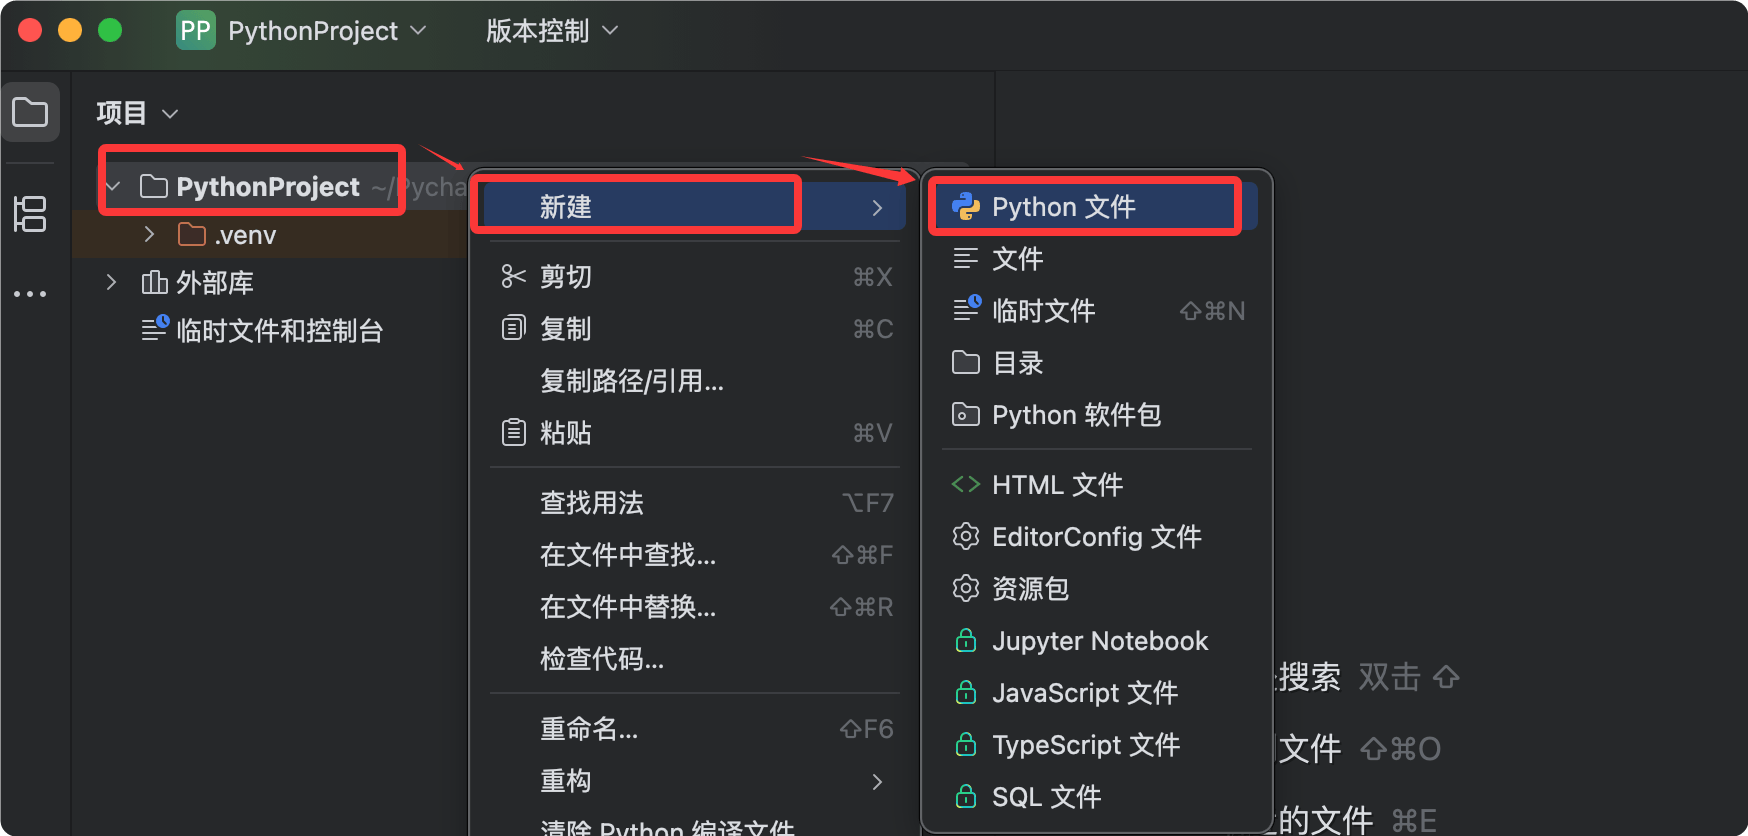
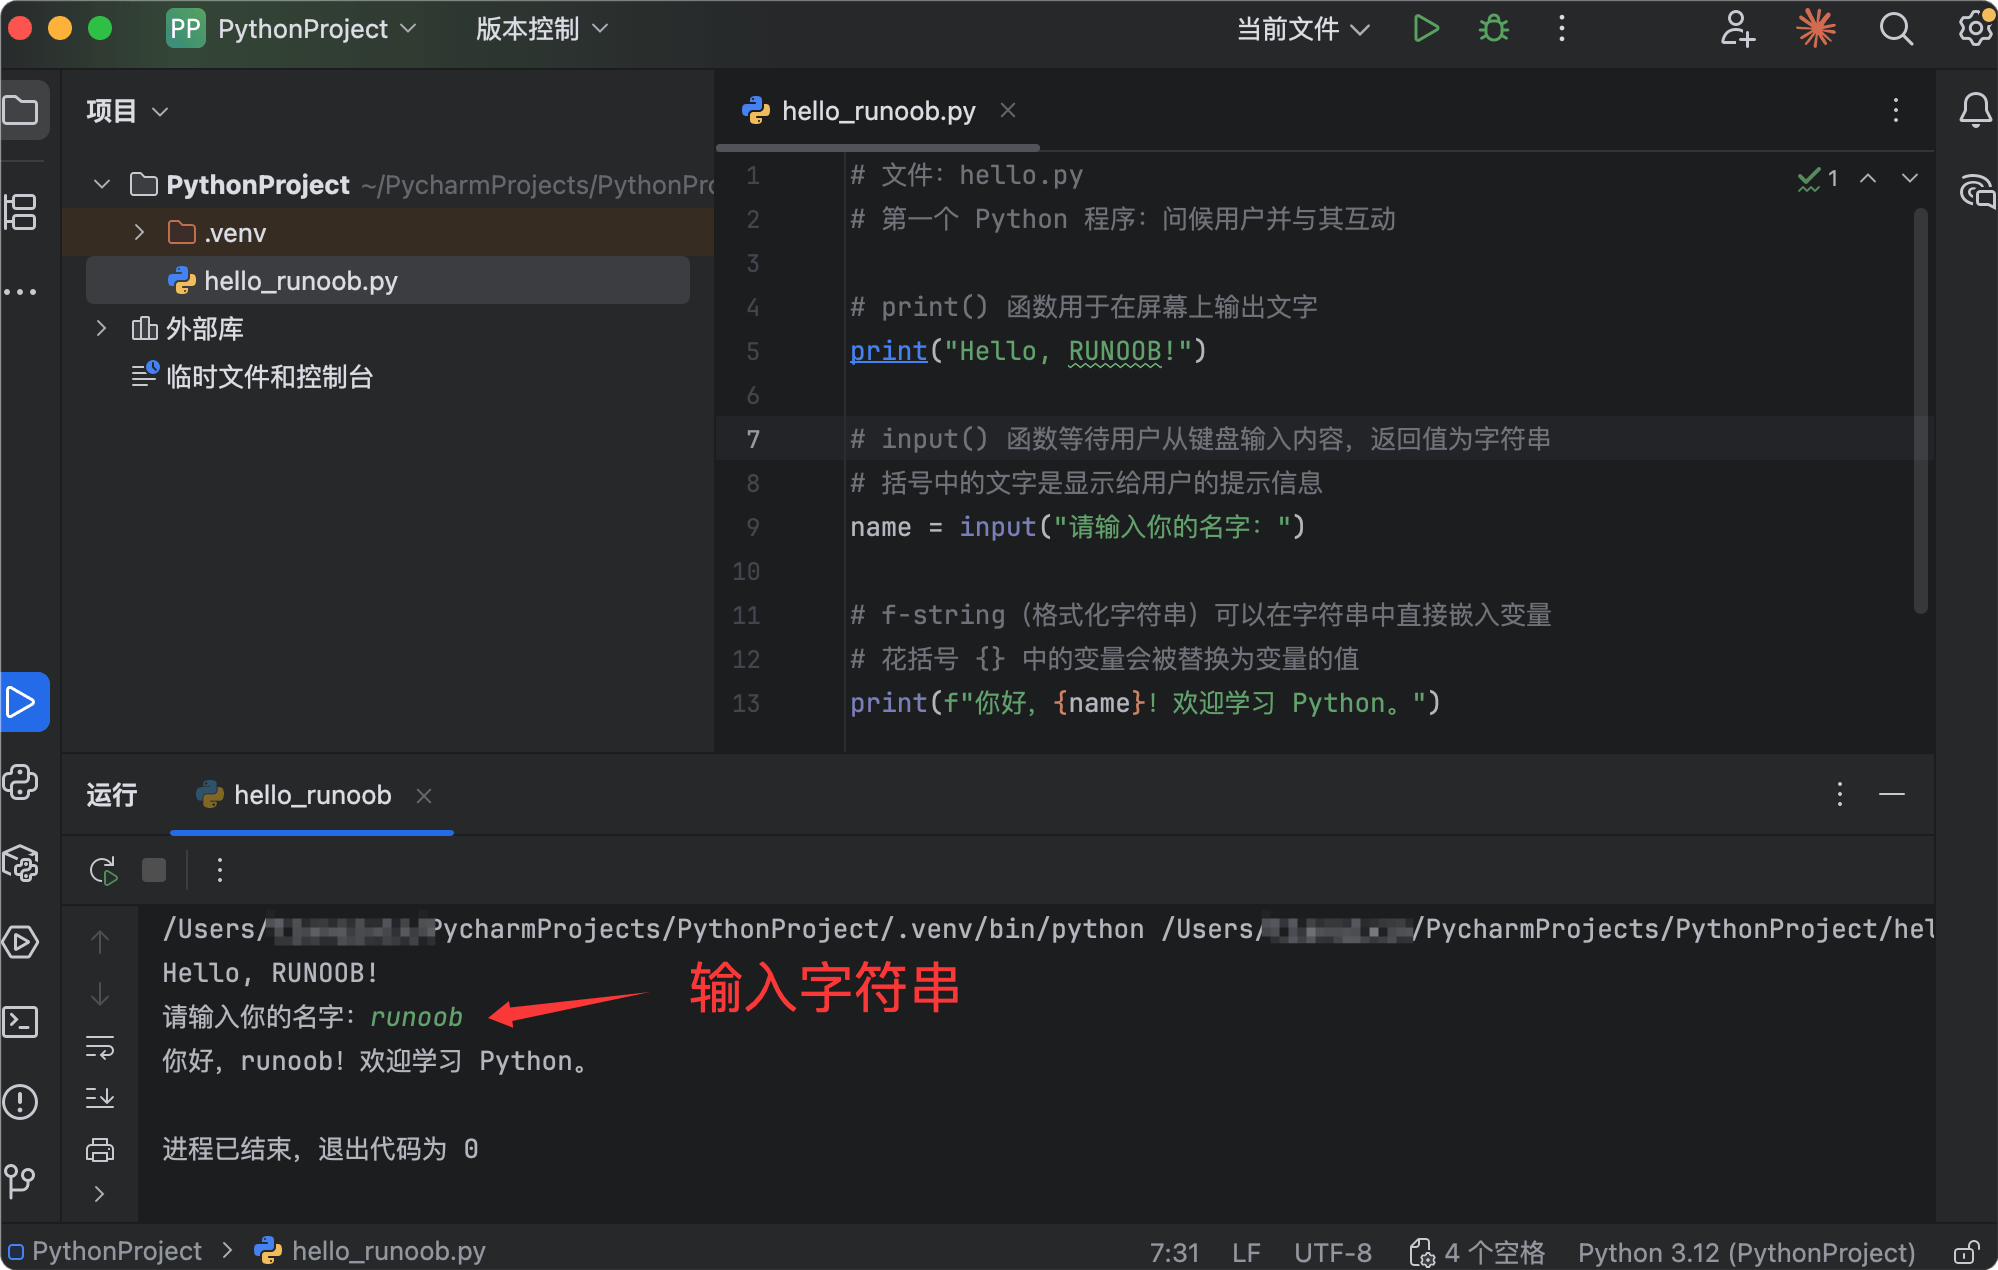
PyCharm will automatically generate the hello_runoob.py file and open it in the editor area on the right for you to write code.
Writing and Running Your First Program
Section titled “Writing and Running Your First Program”After the file is created, write code and run it to see the execution effect of a Python program.
Writing Code
Section titled “Writing Code”Enter the following code in the hello_runoob.py file:
Example
Section titled “Example”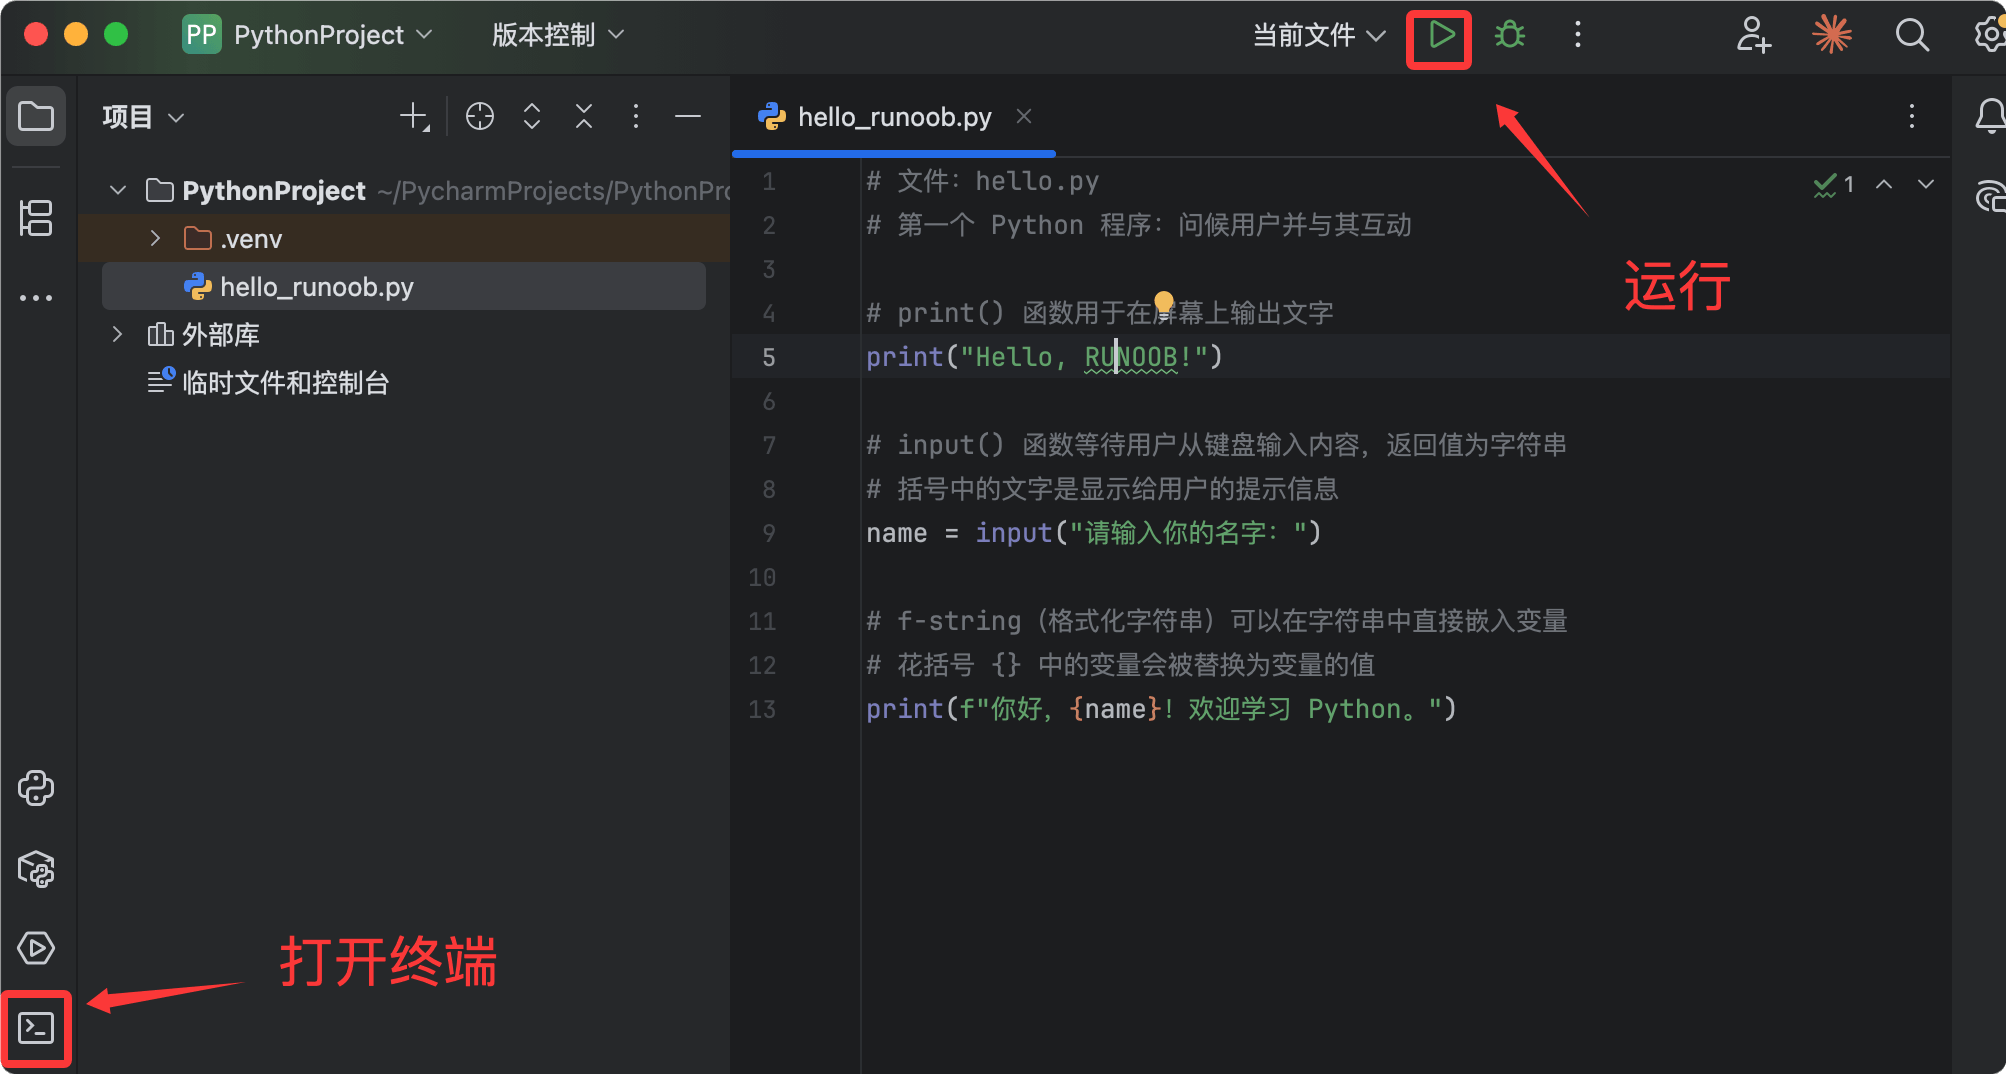
This code does three things:
| Code | Purpose |
|---|---|
print("Hello, RUNOOB!") |
Prints a fixed greeting to the screen |
input("Please enter your name: ") |
Displays a prompt on the screen, waits for the user to enter their name, and stores the input in the variable name after pressing Enter |
print(f"Hello, {name}!...") |
Uses an f-string to embed the value of the variable name into the greeting, generating personalized output |
Running the Program
Section titled “Running the Program”PyCharm provides multiple ways to run your program. Choose any one:
| Run Method | Action |
|---|---|
| Right-click Menu | Right-click anywhere in the editor area and select Run ‘hello’ |
| Run Button | Click the green triangle button in the upper right corner of the code editor area |
| Keyboard Shortcut | Windows/Linux: Shift + F10, macOS: Ctrl + R |
After running, the Run window will pop up at the bottom of PyCharm, displaying the program output:
In the input area of the Run window, type your name and press Enter to see the personalized greeting.
If you see “No Python interpreter configured” when running, it means PyCharm cannot find the Python interpreter. Go to
File → Settings → Project → Python Interpreterand manually specify the Python installation path to resolve this.
Common Troubleshooting
Section titled “Common Troubleshooting”When using Python and PyCharm for the first time, the following are the four most common issues and their solutions.
| Problem Symptom | Possible Cause | Solution |
|---|---|---|
Command line python says “not recognized as an internal or external command” |
Add to PATH was not checked during installation | Re-run the installer and check the option, or manually add the Python path to the system environment variables |
| PyCharm says it cannot find the interpreter | PyCharm did not auto-detect Python | Manually specify the path to the Python executable in File → Settings → Project → Python Interpreter |
| Running code produces no response or an error | Indentation error or file not saved | Check that indentation is consistent (Python strictly requires indentation), and confirm the file is saved (unsaved files have a dot marker next to the file name) |
| Chinese output is garbled | File encoding is not UTF-8 | Set the encoding to UTF-8 in File → Settings → Editor → File Encodings |